
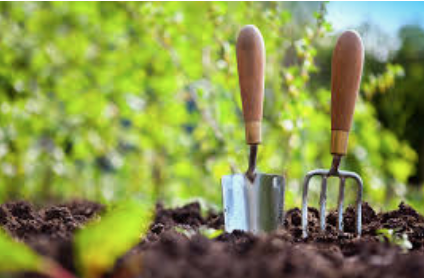
Growing
Propagation
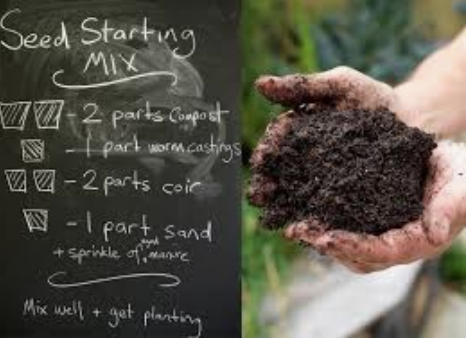
Our mates at Milkwood Permaculture farm have this recipe for seed raising mix which we think is a good balance.
Don’t forget to sift it!
Seed sowing depth –
In general seeds should be planted at a depth of 2x their width or diameter. Super small seeds I usually sprinkle along the top and dust over with soil. Larger either make a furrow or individual holes, lay the seeds with a little distance between each and cover with soil.
Water well.
Propagating by Cuttings
Materials
Firstly select the plant that you want to take cuttings from. Don’t pick them and do them tomorrow, as cuttings will always strike better if they’re really nice and fresh and from the healthiest, best material off the parent plant.
There are three types of cuttings:
- Soft wood cuttings, from stems that still bend and move
- Semi-hardwood cuttings, from stems that are slightly firmer and stiffer
- Hardwood cuttings, from stems off deciduous plants when they’re completely dormant, generally taken in mid-winter
You will need the following:
- Propagating medium. Stephen had washed propagating sand, but perlite also works well as a propagating material.
- A really good, sharp knife
- Propagating hormone. You can use honey or willow bark water, the recipes are under the cutting image. All these products help stimulate callous tissue that will then encourage the cutting to produce roots.
- A dibber. This can be a pencil or a chopstick.
Method
From a cutting about 15cm long, look for a node where the bud was and place the knife in behind the node and slice down, opening the cambium tissue and exposing a larger surface area along the stem. Then slice off the bottom of the cutting on an angle, reducing the whole cutting to about 10cm in length.
If the leaves on something are really large, some people will say cut the leaves, some people say don’t cut the leaves – Stephen does cut the leaves as it allows him to put more than one cutting in a pot. It also reduces transpiration of the cutting allowing it to put all its energy into producing roots.
The next step is to get the dibber and make a hole for the cutting in the propagating mix. You should never just push a cutting into the propagating mix as you may damage the cambium tissue, as well as push away any of the hormone product you have on the cutting.
Once all the cuttings are in place, water them in well. In the coming weeks, make sure the pot is kept moist. This can sometimes be aided with either placing a plastic bag or drink bottle over the top of the cutting, creating a mini greenhouse.
To work out if the cuttings have struck or grown roots, look at the bottom of the pot for root growth coming out of the drainage holes. If so, it’s then time to plant them up into individual pots or even straight into the garden.
Recipe for Rooting hormone
Honey has anti-fungal and antibacterial properties, its important to use raw honey as honey heated above 40degC has lost any of its natural benefits.
Mix 2 tablespoons of honey into 4 tablespoons of water (room temp)
If you are vegan you can use willow bark as your rooting hormone.
Here is the procedure for making willow water:
- Collect young first-year twigs and stems of any of willow (Salix spp.) species, these have green or yellow bark. Don’t use the older growth that has brown or grey bark.
- Remove all the leaves, these are not used. Don’t waste good green material though, compost the leaves or throw them in the garden as mulch.
- Take the twigs and cut them up into short pieces around 1″ (2.5cm) long.
- The next step is to add the water. there are several techniques to extract the natural plant rooting hormones:
a) Place the chopped willow twigs in a container and cover with boiling water, just like making tea, and allow the “tea” to stand overnight.
b) Place the chopped willow twigs in a container and cover with tap water (unheated), and let it soak for several days. - When finished, separate the liquid from the twigs by carefully pouring out the liquid, or pouring it through a strainer or sieve. The liquid is now ready to use for rooting cuttings.The liquid can be kept for up to two months if it’s put into a jar with a tight fitting lid and stored in the refrigerator. Remember to label the jar to remember what it is, and write down the date it was brewed it up, and to aid the memory, write down the date that it should be used by, which is two months from the date it was made!